This post will cover how to build a Kubernetes cluster using Raspberry Pi 5 devices and NVME SSD drives. This can be a cheap and effective way to run a private cloud stack for educational, professional, or home automation purposes. The Pi5 is stacked with some nice performance gains as compared to the Pi4, making it an ideal candidate for running a mini K8s cluster.
Key Differences Between Pi4 and Pi5

To complete this project you’ll need the following cluster components, as well as a way to connect the devices to a network. Wired connections are recommended due to having better performance and reliability than Wifi.
Cluster Components
(Amazon Affiliate Links Below)
- Raspberry Pi 5 – 16Gb RAM
- PCIe to M.2 HAT
- NVMe M.2 SSD Drive
- Power Supply
- Mini Fan (1 fan can cool up to 4 devices)
- Hex Nut Set
- M.2 SSD to USB Adapter
Steps
Install the Raspberry Pi OS
Insert the SSD drive into the USB adapter and connect it to your computer. Install the Raspberry Pi Imager and use the Imager to install the Raspberry Pi OS Lite (64 bit) image onto your SSD drive. Important: Choose “Edit Settings” during the installation process to enter a user name / password, and enable the SSH service. Repeat this step for each drive in your cluster.
Assemble the cluster
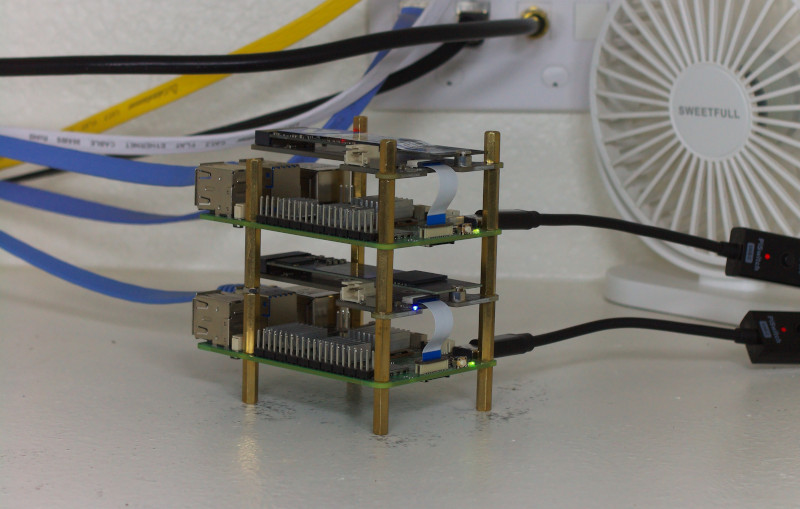
Insert the micro ribbon cable into the PCIe slot on the Pi5 and PCIe-to-M.2 HAT devices. Use the hex bolts to attach the HAT to the Pi5. Insert and secure the SSD drive on the HAT device. At this point we’ve constructed the first node in the cluster. From a sequencing perspective, it’s easiest to build upwards when constructing a cluster. Attach more hex bolts to the top of the first node and continue building upwards in the same order. One mini fan can cool a stack of 3-4 nodes. Cooling is critical, especially in a warm climate, the Pi5 may overheat and shut down without proper active cooling.
Connect power cables to each Pi5 device to boot the cluster.
Reference Cluster Build:
Connect Via SSH
First we need to setup static IPs for the device. My preferred way is to setup a DHCP lease rule in my router. Most internet routing devices have this ability baked in. The goal is to provide a consistent way for cluster nodes to refer to each other. Other ways to do this include using local DNS server or manually adding a static IP to each node.
Next, connect to each device using SSH
ssh [IP Address or DNS name]Enter the user name and password you entered while installing the Raspberry Pi OS image.
Install MicroK8s
Run the following commands on each node in the cluster.
# Update the OS
sudo apt-get update
sudo apt-get upgrade -y

# Install Snapd
sudo apt install snapd

# Install MicroK8s
sudo snap install microk8s --classic

# Add your user to the microk8s group
sudo usermod -a -G microk8s $USER

# Verify Install
snap info microk8s
microk8s.kubectl cluster-info
At this point we can virtually combine the nodes into a cluster. Pick one of the Raspberry Pi’s to be the primary Kubernetes node. Run the following command to start the procedure.
# Add
sudo microk8s.add-node
This will produce an output that needs to be run on the next pi device. It will look like the following, replace PRIMARY_NODE with the IP or DNS of the primary cluster node.
microk8s join [PRIMARY_NODE]:25000/490ef0b124252fdf2c9422e4dF90fn6bThis join command can only be used once per additional node. You’ll need to run the add-node and join commands again for each new node in the cluster.
Test it out!
The cluster is setup and ready to start running containers. Try the following to confirm readiness.
microk8s.kubectl get nodesNext Steps
If you enjoyed this post you may find these other post useful as well: